Softlink / Symbolic Link doesn’t work on Samba – Solved

After upgrading my Samba servers (One is Ubuntu Linux, and the other one on Fedora Linux), I found that I can no longer access the symbolic links / soft links from Windows. It keeps returning “permission error”, “You don’t have permission to access this folder” etc. I am pretty sure that it has nothing to do with my user permission settings because it was working just fine before the upgrade. After trying several solutions, here is what I come up:

Edit your samba configuration file:

sudo nano /etc/samba/smb.conf

Add the following into the global section, i.e.,

[global]
...
follow symlinks = yes
wide links = yes
unix extensions = no
...

Save your file and restart Samba:

sudo /etc/init.d/samba restart

It should work now.

Our sponsors:

Ubuntu 10.04 – Can’t boot / Can’t install – Solved

Since Ubuntu 10.04 is out officially, I like to give it a try on my media server.

FYI, here is the specification of my media server:

Athlon 64 X2 4600
Chipset: GeForce 6150 LE
Motherboard: Asus A8M2N-LA
Harddrive format: IDE

Note that this is a 2006 model and the system was installed on an IDE drive. That may be the reason why the new Ubuntu 10.04 doesn’t like. Anyway, I tried to install Ubuntu 10.04 using three different methods. Here is the detail:

Trial 1 – Fresh install with Ubuntu 64-bit Desktop installation

Won’t even get into the installation menu.
After selecting to boot from CD, the system was stuck in the blank screen. It couldn’t even go further to the installation welcome menu. So I moved to the the next option.

Trial 2 – Fresh install with Ubuntu 64-bit Alternate installation

Better – But can’t reboot.
The installation went very smooth without a single problem. However, after the installation was completed, it couldn’t boot to the Ubuntu system.

Trial 3 – Upgrade from Ubuntu 9.10 64-bit Desktop installation

Works!
This time, I performed a fresh install using Ubuntu 9.10 64-bit Desktop first. The installation went very smooth. After the installation, I did the following in order:

  1. Updated the hardware driver such as graphic and audio.
  2. Updated the the package information:

    sudo apt-get update -y
  3. Upgraded the system to the latest kernel:
    sudo apt-get dist-upgrade -y
  4. Reboot
  5. Now the Ubuntu 9.10 should be ready to move on the next version.

Next, go to System -> Admin -> Software Update

It will give prompt you that a new version of Ubuntu is available. Click that, follow the instructions and you are done!

Note: I’ve tried upgrading the Ubuntu from command line but it failed. Probably there are some differences between the GUI upgrade and the command line upgrade tool.

Enjoy your new Ubuntu, it is really cool!

What about upgrading from Ubuntu 9.04?

I haven’t tried upgrading from Ubuntu 9.04 to Ubuntu 10.04 before, so I cannot comment. However – I tried upgrading from 9.04 to 9.10 and it failed (from command line and GUI). The system could not boot after the upgrade. FYI, here is the specification of my machine:

Mac G3 400MHz
Harddrive format: IDE

It could be the reason of a different architecture (It is a Power PC instead of i386/amd64). Since it is a 10 yrs old machine, I didn’t spend too much effort to investigate.
By the way, I also tried to install Fedora 12 on this machine and it gives the same problem, i.e., Installation goes fine but the system could not boot.

Our sponsors:

MediaWiki Error: “Parse error: syntax error, unexpected T_NAMESPACE, expecting T_STRING in /usr/local/www/apache22/data/wiki/includes/Namespace.php on line 46”


After upgrading my PHP to 5.3.2, I received the following error when accessing MediaWiki (1.6.12):

Parse error: syntax error, unexpected T_NAMESPACE, expecting T_STRING in /usr/local/www/apache22/data/wiki/includes/Namespace.php  on line 46

There are three solutions:

  1. Downgrade your PHP from 5.3 back to 5.2
  2. Upgrade your MediaWiki to a newer version.
  3. Fix the codes.

In my case, the first couple solutions do not work for me, and therefore I choose 3.

  1. Backup your wiki file first.
  2. Access your webserver and go to the MediaWiki/includes directory.
    For example:

    cd /usr/local/www/apache22/data/wiki/includes
  3. Edit Namespace.php
    nano Namespace.php
  4. Go to line 46, change the following from:
    class Namespace {

    to:

    class MWNamespace {

    Save the file.

  5. Now, let’s create a script:
    nano wikifix.sh

    Copy and paste the following:

    for fl in *.php; do
    mv $fl $fl.old
    sed 's/Namespace::/MWNamespace::/g' $fl.old > $fl
    done

    Save the file.

  6. Change the file to executable by:
    chmod u+x wikifix.sh
  7. Search the keyword Namespace:: and replace it by MWNamespace:::
    ./wikifix.sh

    Warning: Don’t run the script twice!

  8. Delete the script.
    rm wikifix.sh

Try to access the MediaWiki again and the problem should be gone.

Enjoy Wiki.

–Derrick

Our sponsors:

ERROR 2006 (HY000) at line 172: MySQL server has gone away

Today I imported the MySQL database and I got the following error:

# mysql -u root -p db_test < test.db
Enter password:
ERROR 2006 (HY000) at line XX: MySQL server has gone away

It is because the data (SQL query) is too large to imported. To solve this problem, simply edit the MySQL configuration files: /etc/my.cnf

Replace the following from:

max_allowed_packet = 1M

To:

max_allowed_packet = 16M

Or something higher.

Restart the MySQL server again and the problem will be gone.

/usr/local/share/mysql/mysql.server restart

–Derrick

Our sponsors:

Starting MySQL.. ERROR! The server quit without updating PID file

This article is a bit outdated. Please visit the following article instead. It includes a better discussion on how to solve this problem using different scenarios:

Thanks.

–Derrick

Our sponsors:

Weird PHP Error after FreeBSD port upgrade (PHP Warning: PHP Startup: Unable to load dynamic library)

Today I upgraded the port on my FreeBSD box using portmaster tools:

portmaster -Dai

After that, I found that the PHP gave the following weird error:

php -v

PHP Warning:  PHP Startup: Unable to load dynamic library '/usr/local/lib/php/20060613/memcached.so' - /usr/local/lib/php/20060613/memcached.so: Undefined symbol " php_session_create_id" in Unknown on line 0

PHP Warning:  PHP Startup: Unable to load dynamic library '/usr/local/lib/php/20060613/mysql.so' - Cannot open "/usr/local/lib/php/20060613/mysql.so" in Unknown on line 0

PHP 5.2.12 with Suhosin-Patch 0.9.7 (cli) (built: Apr  6 2010 15:50:36)
Copyright (c) 1997-2009 The PHP Group
Zend Engine v2.2.0, Copyright (c) 1998-2009 Zend Technologies

In order to solve this problem, you will need to rebuild the port. In my situation, I need to clean up, uninstall, rebuild and install the affected ports:

Memcached: /usr/ports/databases/pecl-memcached

MySQL: /usr/ports/databases/php5-mysql

——————————————————————————————
Update on 2010.04.13:
Your situation may be different from mine. The tricky part is to rebuild the port at the right location. For example, if your PHP complains about pdo.so, you can rebuild the port at the affected location:

/usr/ports/database/php5-pdo

If you are not sure where does the port locate, you can search it on Google or find it with the following command:

find /usr/ports/ -name "*pdo*"

——————————————————————————————

In each affected port, run the following commands:

make clean
make deinstall
make
make install && sync
make clean

After that, restart the PHP by restarting Apache:

sudo apachectl restart

and run the php command again:

php -v

The error should be gone:

PHP 5.2.12 with Suhosin-Patch 0.9.7 (cli) (built: Apr  6 2010 15:50:36)
Copyright (c) 1997-2009 The PHP Group
Zend Engine v2.2.0, Copyright (c) 1998-2009 Zend Technologies

Our sponsors:

[Solved]Shared object “libtokyocabinet.so.8” not found

After upgrading the Tokyo Cabinet on my FreeBSD 8 system, I could not start Tokyo Cabinet:

ttserver
/libexec/ld-elf.so.1: Shared object "libtokyocabinet.so.8" not found, required by "ttserver"

After some investigations, I solved the problem.

1. First, go to the library directory. In my case, it is /usr/local/lib.

cd /usr/local/lib

2. Display all the libtokyocabinet.so:

ls libtokyocabinet.so*

which returns:

lrwxr-xr-x  1 root  wheel    24B Jan  9 20:17 libtokyocabinet.so -> libtokyocabinet.so.9.4.0
lrwxr-xr-x  1 root  wheel    24B Jan  9 20:17 libtokyocabinet.so.9 -> libtokyocabinet.so.9.4.0
-rwxr-xr-x  1 root  wheel   778K Jan  9 20:17 libtokyocabinet.so.9.4.0

So the solution to this problem is pretty obvious. The application is looking for libtokyocabinet.so.8 but a newer version of this library is available. A soft-link is good enough to solve this problem:

sudo ln -s libtokyocabinet.so libtokyocabinet.so.8

Here is the expected result:

ls libtokyocabinet.so*
lrwxr-xr-x  1 root  wheel    24B Jan  9 20:17 libtokyocabinet.so -> libtokyocabinet.so.9.4.0
lrwxr-xr-x  1 root  wheel    18B Jan  9 20:26 libtokyocabinet.so.8 -> libtokyocabinet.so
lrwxr-xr-x  1 root  wheel    24B Jan  9 20:17 libtokyocabinet.so.9 -> libtokyocabinet.so.9.4.0
-rwxr-xr-x  1 root  wheel   778K Jan  9 20:17 libtokyocabinet.so.9.4.0

Now I run the Tokyo Cabinet again, and the problem is gone!

ttserver
2010-01-09T20:26:12-06:00       SYSTEM  --------- logging started [13244] --------
2010-01-09T20:26:12-06:00       SYSTEM  server configuration: host=(any) port=1978
2010-01-09T20:26:12-06:00       SYSTEM  opening the database: *
2010-01-09T20:26:12-06:00       SYSTEM  service started: 13244
2010-01-09T20:26:12-06:00       INFO    timer thread 1 started
2010-01-09T20:26:12-06:00       INFO    worker thread 1 started
2010-01-09T20:26:12-06:00       INFO    worker thread 2 started
2010-01-09T20:26:12-06:00       INFO    worker thread 3 started
2010-01-09T20:26:12-06:00       INFO    worker thread 4 started
2010-01-09T20:26:12-06:00       INFO    worker thread 5 started
2010-01-09T20:26:12-06:00       INFO    worker thread 6 started
2010-01-09T20:26:12-06:00       INFO    worker thread 7 started
2010-01-09T20:26:12-06:00       INFO    worker thread 8 started
2010-01-09T20:26:12-06:00       SYSTEM  listening started

Our sponsors:

[Solved]Fedora Linux Repository Error ([Errno 14] PYCURL ERROR 6)

I was having trouble to update my Fedora Linux system by running sudo yum update.

sudo yum update
Loaded plugins: presto, refresh-packagekit
Error: Cannot retrieve repository metadata (repomd.xml) for repository: fedora.
Please verify its path and try again

sometimes I see different sets of error:

http://download.fedoraproject.org/pu...ta/repomd.xml: [Errno 14] PYCURL ERROR 6 - ""

or

http://download.fedoraproject.org/pu...ta/repomd.xml: [Errno 14] PYCURL ERROR 7 - ""

After searching these error messages on Google, I found tons of the workaround methods. Unfortunately, none of them works! Finally, I came up a way to fix this problem.

The reason why you see this error message because your system could not connect to the main Fedora server(At the time of writing this blog, fedoraproject.org has been downed for at least 4 days.), so that your computer is not redirected to any Fedora mirror servers. The easiest way to fix this problem is by specifying a mirror server in your yum repository configuration file.

First, let’s find a mirror that is closed to your location:

Fedora Mirror (Fedoraproject.org)

or

Google Cache

If you have any trouble to access the information, here is a copy of the list:

North America

ftp://limestone.uoregon.edu/fedora/extras
http://limestone.uoregon.edu/fedora/extras
ftp://fedora.bu.edu/extras
http://mirrors.kernel.org/fedora/extras
ftp://mirrors.kernel.org/fedora/extras
rsync://mirrors.kernel.org/fedora/extras
ftp://ftp.muug.mb.ca/pub/fedora/linux/extras/
http://www.muug.mb.ca/pub/fedora/linux/extras/
rsync://rsync.muug.mb.ca/fedora-linux-extras/
http://mirror.hiwaay.net/redhat/fedora/linux/extras/
ftp://mirror.hiwaay.net/redhat/fedora/linux/extras/
rsync://mirror.hiwaay.net/fedora-linux-extras/
ftp://mirror.phy.olemiss.edu/fedora/extras/
http://mirror.phy.olemiss.edu/mirror/fedora/extras/
http://fedora.mirrors.tds.net/pub/fedora-core-extras
ftp://fedora.mirrors.tds.net/pub/fedora-core-extras
rsync://fedora.mirrors.tds.net/fedora-core-extras
http://mirror.cpsc.ucalgary.ca/mirror/fedora/linux/extras/
ftp://mirror.cpsc.ucalgary.ca/mirror/fedora/linux/extras/
rsync://mirror.cpsc.ucalgary.ca/fedora-linux-extras/
http://www.gtlib.gatech.edu/pub/fedora.redhat/linux/extras/
ftp://ftp.gtlib.gatech.edu/pub/fedora.redhat/linux/extras/
rsync://rsync.gtlib.gatech.edu/fedora-linux-extras/

Europe

http://sunsite.mff.cuni.cz/pub/fedora-extras/
ftp://sunsite.mff.cuni.cz/pub/fedora-extras/
rsync://sunsite.mff.cuni.cz/fedora/extras/
ftp://alviss.et.tudelft.nl/pub/fedora
http://ftp.lug.ro/fedora/linux/extras/
ftp://ftp.lug.ro/fedora/linux/extras/
http://ftp.uni-bayreuth.de/linux/fedora/linux/extras
ftp://ftp.uni-bayreuth.de/pub/linux/fedora/linux/extras
rsync://rsync.uni-bayreuth.de/fedora-linux-extras
http://ftp1.skynet.cz/pub/linux/fedora/extras/
ftp://ftp1.skynet.cz/pub/linux/fedora/extras/
ftp://ftp.tu-chemnitz.de/pub/linux/fedora-core-extras/
http://wftp.tu-chemnitz.de/pub/linux/fedora-core-extras/
ftp://ftp.chl.chalmers.se/pub/fedora/linux/extras/
ftp://ftp.udl.es/pub/fedora/linux/extras/
http://ftp.udl.es/pub/fedora/linux/extras/
rsync://ftp.udl.es/pub/fedora/linux/extras/
ftp://gd.tuwien.ac.at/opsys/linux/fedora/extras/
http://gd.tuwien.ac.at/opsys/linux/fedora/extras/
rsync://gd.tuwien.ac.at/opsys/linux/fedora/extras/
http://fr.rpmfind.net/linux/fedora/extras/
ftp://fr.rpmfind.net/linux/fedora/extras/
rsync://fr.rpmfind.net/linux/fedora/extras/
http://mirror.etf.bg.ac.yu/fedora/linux/extras
ftp://mirror.etf.bg.ac.yu/fedora/linux/extras
rsync://mirror.etf.bg.ac.yu/fedora/linux/extras

http://mirror2.etf.bg.ac.yu/fedora/linux/extras
ftp://mirror2.etf.bg.ac.yu/fedora/linux/extras
rsync://mirror2.etf.bg.ac.yu/fedora/linux/extras
ftp://klid.dk/fedora/linux/extras/
http://klid.dk/homeftp/fedora/linux/extras/

Russia

http://ftp.rhd.ru/pub/fedora/linux/extras/
ftp://ftp.rhd.ru/pub/fedora/linux/extras/
ftp://ftp.chg.ru/pub/Linux/fedora/linux/extras/
http://ftp.chg.ru/pub/Linux/fedora/linux/extras/
rsync://ftp.chg.ru/fedora/linux/extras/

Taiwan, Asia

http://ftp.isu.edu.tw/pub/Linux/Fedora/linux/extras/
ftp://ftp.isu.edu.tw/pub/Linux/Fedora/linux/extras/

Australia

http://planetmirror.com/pub/fedora/linux/extras/
ftp://ftp.planetmirror.com/pub/fedora/linux/extras/
rsync://rsync.planetmirror.com/fedora/linux/extras/
http://mirror.pacific.net.au/linux/fedora/linux/extras/
ftp://mirror.pacific.net.au/linux/fedora/linux/extras/

In my example, I will use the following parameters:
Mirror: http://fedora.mirrors.tds.net/
Version($releasever): 12
Architecture($basearch): x86_64

If you are not sure how to determine the version and the architecture, you can type:

cat /etc/redhat-release && uname -a

It should say something like:

Fedora release 12 (Constantine)
Linux 2.6.31.6-145.fc12.x86_64 #1 SMP Sat Nov 21 15:57:45 EST 2009 x86_64 x86_64 x86_64 GNU/Linux

Next, run the following:

sudo nano /etc/yum.repos.d/fedora.repo

and edit the following from:

[fedora]
...
baseurl=http://download.fedoraproject.org/pub/fedora/linux/releases/$releasever/Everything/$basearch/os/

[fedora-source]
baseurl=http://download.fedoraproject.org/pub/fedora/linux/releases/$releasever/Everything/source/SRPMS/

to:

[fedora]
...
#baseurl=http://download.fedoraproject.org/pub/fedora/linux/releases/$releasever/Everything/$basearch/os/
baseurl=http://fedora.mirrors.tds.net/pub/fedora/releases/12/Everything/x86_64/os/

[fedora-source]
...
#baseurl=http://download.fedoraproject.org/pub/fedora/linux/releases/$releasever/Everything/source/SRPMS/
baseurl=http://fedora.mirrors.tds.net/pub/fedora/releases/12/Everything/source/SRPMS/

Now, let’s do something similar to another file:

sudo nano /etc/yum.repos.d/fedora-updates.repo
[updates]
...
#baseurl=http://download.fedoraproject.org/pub/fedora/linux/updates/$releasever/$basearch/
baseurl=http://fedora.mirrors.tds.net/pub/fedora/updates/12/x86_64/

[updates-source]
...
#baseurl=http://download.fedoraproject.org/pub/fedora/linux/updates/$releasever/SRPMS/
baseurl=http://fedora.mirrors.tds.net/pub/fedora/updates/12/SRPMS/

Now, try to run the update again by:

sudo yum clean all
sudo yum update

It should work now. Enjoy your update!

Thoughts:

The reason why this problem happens because the Fedora server is down for at least 4 days(From 12/31 to 1/4, 2010, for four days.), and the problem is not fixed! Yes I know it is in the holiday, but it is not an excuse.

One reason why my company prefers using Fedora Linux is that it has a long history and it is backed by Red Hat. Now the quality of their service seems going down. (Their servers have gone down multiple times in December, and each down time lasted longer than a day.) I think it is probably about time for us to move to a different Linux distribution, such as Ubuntu.
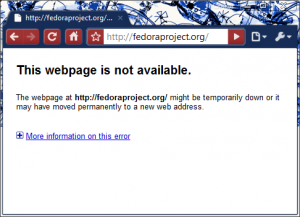
Fedoraproject.org has downed.

FYI, I personally use FreeBSD for all of my server applications.

–Derrick

Our sponsors:

Installing from FreeBSD ports without prompt

When I configure my FreeBSD box, I like to install the applications from the ports instead of using pkg_add, because I can customize the configurations and optimize the compile process for my systems. However, if an application comes with lots of dependencies, it will take me a long time because I will need to sit in front of the computer and choose the options for each applications. It is a very time-consuming process.

So, how to make the process automatic? Here is the trick:

To use the default options, simply do:

sudo make -DBATCH install clean

Or view all of the options at the beginning:

sudo make config-recursive
sudo make install clean

Hope these two tricks will save you few hours.

–Derrick

Our sponsors:

Installing XAMPP on Fedora 12 64-bit system

I was installing XAMPP on Fedora 11 64-bit today, and I saw this famous message:

sudo /opt/lampp/lampp startapache
XAMPP is currently only availably as 32 bit application. Please use a 32 bit compatibility library for your system.

The message is very clear that XAMPP doesn’t like 32-bit system. So, we will need to cheat XAMPP that the system is 32-bit. First, we will need to install some libraries:

sudo yum -y install glibc.i686 libgcc.i686 libstdc++.i686

and now, we need to skip the 32-bit annoying check. Use Nano or your favorite editor to open this file: /opt/lampp/lampp

sudo nano /opt/lampp/lampp

Replace the following from:

# XAMPP is currently 32 bit only
case `uname -m` in
       *_64)
       if /opt/lampp/bin/php -v > /dev/null 2>&1
       then
               :
       else
               $de && echo "XAMPP gibt es zur Zeit nur als 32-Bit Applikation. Bitte verwende eine 32-Bit Kompatibilitaetsbibliothek fuer Dein System."
               $de || echo "XAMPP is currently only availably as 32 bit application. Please use a 32 bit compatibility library for your system."
               exit
       fi
       ;;
esac

To:

# XAMPP is currently 32 bit only
#case `uname -m` in
#       *_64)
#       if /opt/lampp/bin/php -v > /dev/null 2>&1
#       then
#               :
#       else
#               $de && echo "XAMPP gibt es zur Zeit nur als 32-Bit Applikation. Bitte verwende eine 32-Bit Kompatibilitaetsbibliothek fuer Dein System."
#               $de || echo "XAMPP is currently only availably as 32 bit application. Please use a 32 bit compatibility library for your system."
#               exit
#       fi
#       ;;
#esac

Now run the following the start XAMPP:

sudo /opt/lampp/lampp startapache

Wow! Everything is working great!

–Derrick

Our sponsors: