I am a heavy user of Adobe Lightroom. Often, I need to access my Lightoom catalog files using multiple computers. Currently, Lightroom only allows users to save the catalog files on a local hard drive, which is very inconvenient. For example, after I do the work using my office computer, I like to continue my work using my home computer. Unfortunately, it is very hard to synchronize my work with the current settings. I just don’t understand why Adobe have such a requirement because the catalog file is nothing more than a SQL Lite file (i.e., a database).
I tried to google for the solution, and I found a lot of different creative (but not practical) solutions. For example, someone suggested that the catalog could be saved on an external hard drive. Other suggested that the catalog can be saved to Dropbox, and let Dropbox to handle the synchronization. While these solutions seem to work, they are not practical at all! For the first solution (saving the data to an external drive), I think it is too risky and inconvenient to carry the data because the drive may fail at any time. For the second solution (saving the data to Dropbox), it only works for those who have fiber optics connections. For example, my catalog is nearly 40GB. Think about how long goes it take to upload/download a 40GB file with Dropbox…
Anyway, before you come here, you’ve probably already tried some other solutions, such as mapping your network drive locally, or creating a symbolic link. Obviously, none of those can trick Lightroom. Finally, I found a way to save my Lightroom catalog on a network drive. It is very simple and it can be done in few minutes.
I tested my solution on Windows 7 with Lightroom 4.4 and 5, and both Lightrooms have no problem to recognize my catalog that is stored on a network drive.
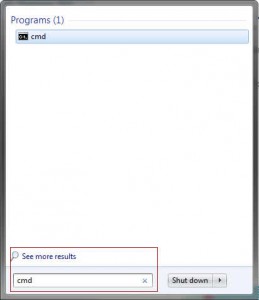
First, go to command prompt. You can do it by clicking the Start icon and type cmd and hit the ENTER key.
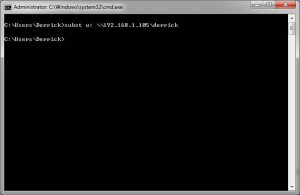
Now you will see a command line window. Type the following:
subst X: \\servername\sharename\
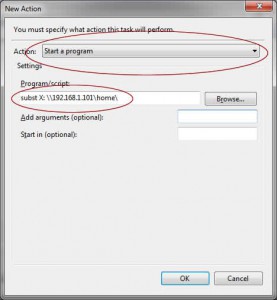
For example, suppose I want to map \\192.168.1.101\home to X:, I can type the following:
subst X: \\192.168.1.101\home\
Please click the thumbnail to enlarge the screenshots.
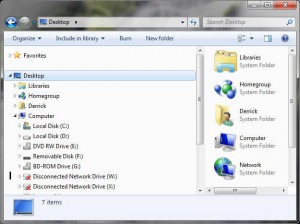
Now if you head to Windows Explorer, you will see something like this. Don’t worry about the “Disconnected Network Drive”, it is misleading. Try to open the drive. If it works, then you are half way done.
Now try to create a new Lightroom catalog and save to here. Adobe Lightroom doesn’t complain!
Next, we want to make this solution permanent. That’s because what we just did is for the current session only. Once we log off or reboot the computer, the drive will be gone. We are going to make Windows to automatically map the drive for us.
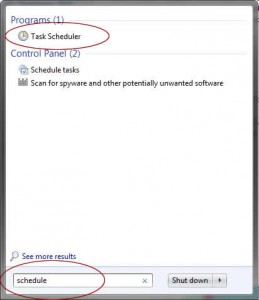
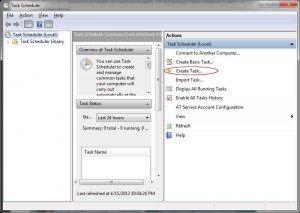
First, go to Start and type schedule. This will bring up the Task Schedule.
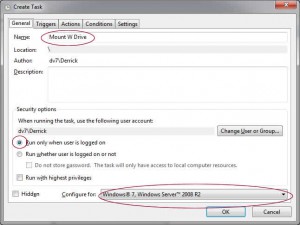
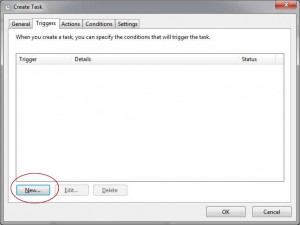
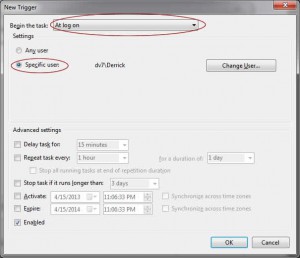
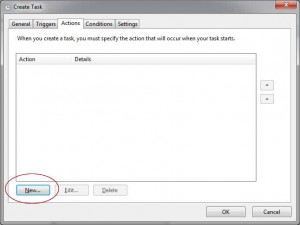
Click Create Task and following the screenshots:
After saving your task. Try to reboot your computer. Make sure that your network drive comes back after boot. If everything works fine, then you are can move your Lightroom catalog to the network drive.
Before moving your production work to the network drive, I suggest you to create a test catalog first. If it is stable after trying for multiple times, then you can safely move your production work to the network drive.
Have fun with Lightroom (and network drive)!
–Derrick
Our sponsors:

