Yesterday, I was processing some of the pictures in Adobe Lightroom. I liked to export few of them to Photomatix for HDR processing. Then, the system complained with this error message:
Lightroom rendition failed
After searching this error message on Google, I found that this message was generated by the Photomatix plug-in. According to Photomatix’s FAQ, it seems that the original picture is missing.
So, I ran a quick test (Find Missing Photos) in Adobe Lightroom, and of course it didn’t find anything. After some investigations, I found that the problem was caused by low free space in harddrive.
It is very easy to solve this problem. Simply change the Windows temporary drive to somewhere else and you are done.
So what cause this problem? When you export the pictures to other applications, Lightroom will first convert them in some common format first (usually TIFF), such that the other applications will be able to read the files. During this process, Lightroom will store these pictures in the temporary directory provided by Windows, and this settings cannot be changed within Lightroom.
By default, the temporary directory is in the system drive (e.g., C:). If you are using SSD harddrive, you may have very limited amount of free space left. Therefore, it is a good idea to assign the temporary directory to another drive with more space.
Here are the step by step tutorial:
- Start
- Control Panel
- System
- Advanced system settings
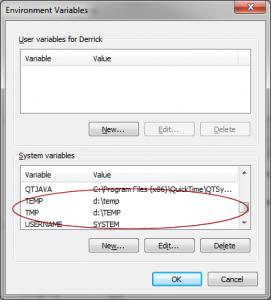
- Environment Variables
Now we are ready to change the location of temporary directory. Let’s edit the TEMP and TMP, and change them to something else. In my case, I have more space in d:, so I set them to D:\Temp.
Click OK and save. Now, restart your Lightroom and the error message will be gone.
–Derrick
Our sponsors:


